How To: Dual Boot Mac OS X Mavericks 10.9 & Yosemite 10.10
For those of you who've already gotten Beta Preview or Developer Preview access to Mac OS X 10.10 Yosemite, I highly recommend installing it on a separate partition on your hard drive.There have been many reported bugs and even blank gray screens that prevent access to the system, so if you install over your current OS, you're risking having to boot into recovery or reinstall from the ground up.Installing the Yosemite beta on a separate partition means your 10.9 Mavericks partition will be safe and sound, and that you won't have to use Yosemite as your primary operating system. Plus, you're free to uninstall Yosemite at any time without ruining your Mavericks partition, and you can even give that Yosemite partition's space back to Mavericks if need be.Don't Miss: How to Dual Boot Yosemite 10.10 & El Capitan 10.11
System RequirementsApple has stated that the requirements to run Yosemite are pretty much the same as with Mavericks, so if you're currently running Mavericks, you should be set to install Yosemite, too.It's also stated that Yosemite only needs 8 GB of available storage, but in my case, after installing Yosemite on my second partition, it reads just over 13 GB used. To play it safe, I would recommend making your second partition at least 20 GB large (I chose 50 GB).Also, you may want to make a bootable install USB drive of Yosemite just in case you need to try again, or want to install it on another one of your computers without downloading the install file again from the Mac App Store. You don't need one, but I recommend it.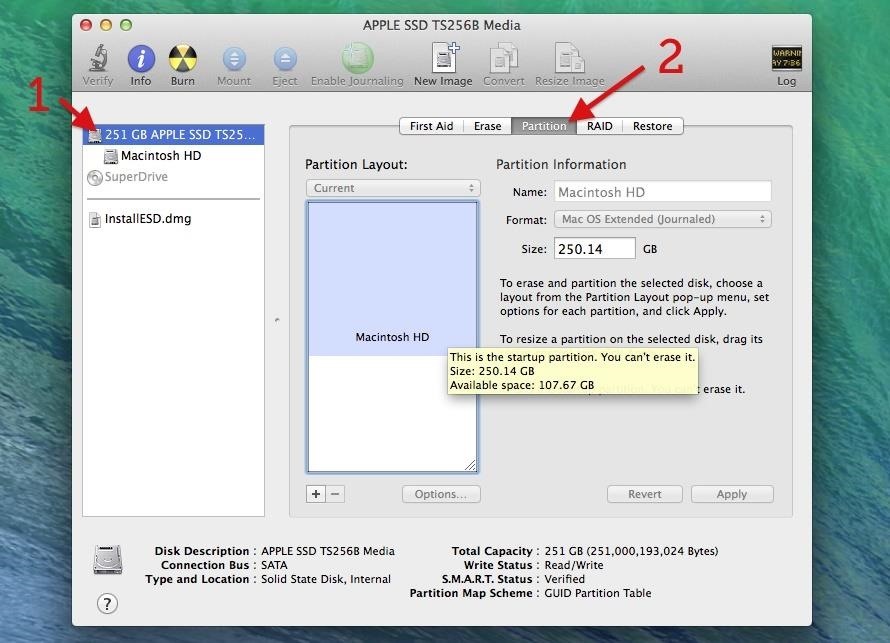
Step 1: Create a New PartitionOpen up Disk Utility on your Mac, and in the left section, select the hard drive that your main OS partition is installed on. Then, select the Partition tab. [1] Select your hard drive, [2] then the Partition tab. Hit the plus sign (+) to add a second partition, name it Yosemite (or whatever else you want), choose the Mac OS Extended (Journaled) format, choose your size for the new partition, and hit Apply. [3] Add a new partition, [4] name it, [5] choose the right format, [6] size it, [7] and Apply. In my case, I chose about 50 GB for more Yosemite partition. Again, you can choose whatever you want, though I recommend at least 20 GB.Next, hit the Partition button to confirm. [8] Select the Partition button. And wait. It'll go through the process of checking the catalog hierarchy, shrinking the disk, updating your recovery partition location, etc. Once it's all done, your new partition will automatically mount.
What if You Can't Create a New PartitionIf you already have a second partition, either created by Disk Utility or Boot Camp, or if you're encrypting your disk with FileVault, you may not be able to create a new partition.You can disable FileVault and delete those other partitions and try again, but you're probably better off installing your Yosemite OS on a USB hard drive (preferably USB 3.0 or Thunderbolt compatible). It won't be as fast as your internal disk, but for a beta, it should be perfectly acceptable.If you have a really large hard drive, you can also partition it using the guide above, if you don't want to devote the whole thing to Yosemite.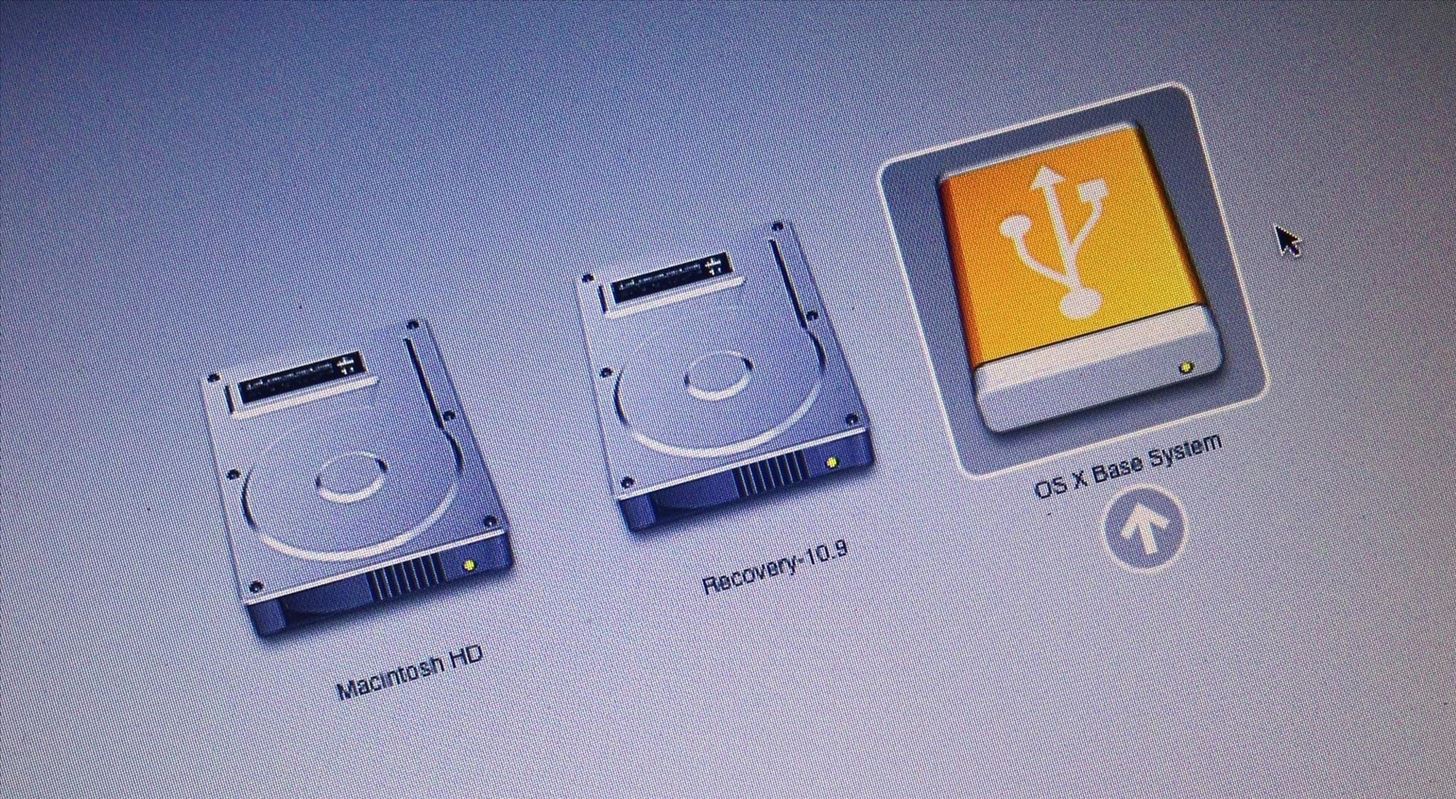
Step 2: Open the Mac OS X 10.10 Installer FileIf you're not using a bootable install USB drive of Yosemite, just head to your Applications folder and double-click on the Install OS X 10.10 file.If you are using the bootable drive, restart your computer while holding the Option (Alt) key. Wait until the Startup Manager pops up, then select your new OS X Base System volume. Alternatively, you can just hold down the C button while starting up to boot directly into the USB drive. The "Startup Manager" screen when installing from USB drive.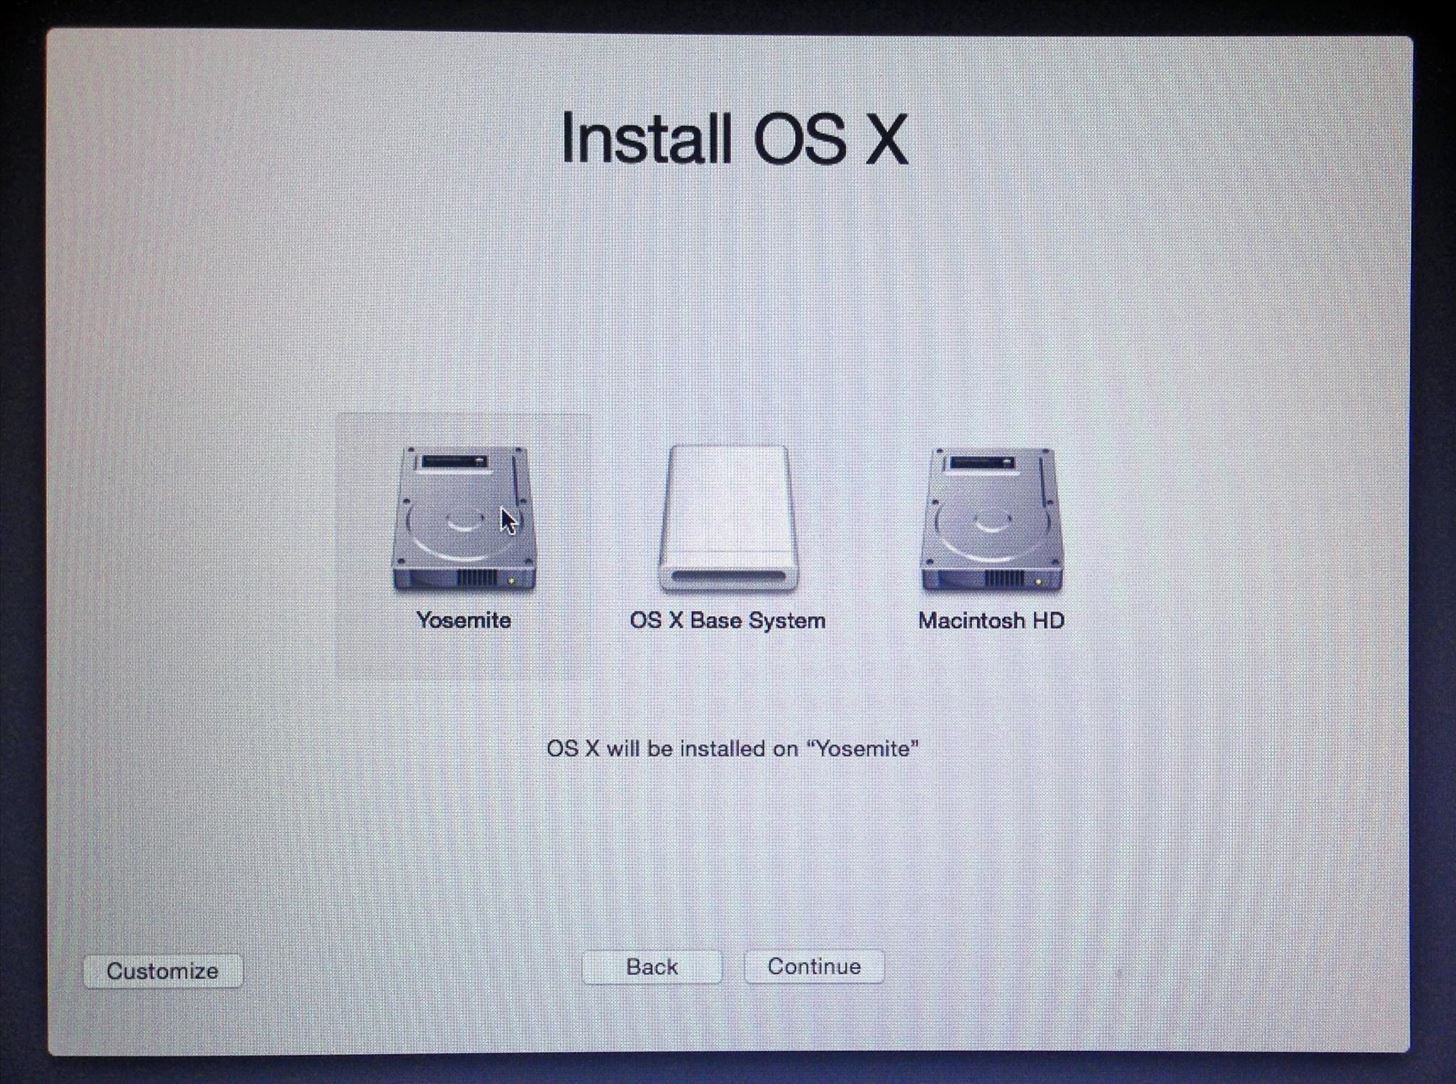
Step 3: Install Yosemite on Your New PartitionNow all you have to do is follow the install instructions. When you come to the Install OS X screen, make sure to select the right disk, in my case, that's Yosemite. Choose your new partition on the "Install OS X" screen. Image via wonderhowto.com Once it's done installing, you'll get to the Welcome screen, and you should be able to figure it out from there.I would recommend not using Migration Assistant to transfer files over from your Mavericks installation, as this will just duplicate everything. Since this is a beta build of Yosemite, I would skip it and install all of the third-party apps you want to play around with directly from Yosemite.Whenever you want to switch from Mavericks to Yosemite, just restart while holding down the Option (Alt) key and select which one you want to boot.If you used a bootable USB install guide and run into any issues during the installation, check out these troubleshooting tips for help.
How To: Easily SSH into your iPhone without Wifi How To: SSH into your iPhone or iPod Touch with ease How To: Connect to an iPhone or iPod Touch from a PC via SSH How To: SSH on iPhone, iPhone 3G, and iPod Touch How To: SSH into a jailbroken iPod Touch or iPhone How To: Controll your computer from your iPhone/iPod Touch
How to Use WinSCP to SSH into your iPod Touch or iPhone
The Trick to Listening to YouTube in the Background on Your
Think Your Deleted Facebook Posts Are Really Deleted? that post isn't actually deleted. So what gives? A Facebook engineer named Scott Renfro commented on her post with some very
Get Into Someone's Phone | How To : Facebook Undo Gives You 5
If you choose to use your OnePlus 3 and or 3T with on-screen navigation buttons, you can swap the placement of the Back and Recents buttons so that they are in the same order as those on the
OnePlus 3, 3T Button Settings - Swap Back and - TechLoverHD
Touch Apps. Touch Browser. Touch Menu for more broweser options.. Tip: To zoom, touch the display with two fingers, then move them apart. Connect. Your smartphone uses the mobile phone network (over the air) or a Wi-Fi connection to automatically access the Web.
Verizon Wireless Deals | Free Phones & Unlimited Data
AD
VerizonWirelessDeals.com
Report Ad
Great Cell Phone Deals & Plans Exclusively from Verizon Wireless.
Google hacking, also named Google dorking, is a computer hacking technique that uses Google Search and other Google applications to find security holes in the configuration and computer code that websites use.
How to Make $100,000? Just Hack Google Chromebook
The iOS 13, iPadOS, macOS Catalina, and tvOS 13 public betas are coming soon. As a member of the Apple Beta Software Program, you can help shape Apple software by test-driving pre-release versions and letting us know what you think.
Samsung Gear S: Smartwatch like Dick's (but not Android
How To: Root Your Nexus 7 Tablet Running Android 4.4 KitKat (Windows Guide) How To: Enable the Hidden Debug Options for Select Google Apps on Your Nexus 5 How To: Hide Your Nexus 7's Soft Keys to Maximize Usable Screen Space
How to enable Developer Options on your Android device
Here's a fun weekend project you can use to add to a common toy. Get a yo-yo with concave sides, a few pieces of thin plastic (like from a CD case) and a few lithium-powered LEDs. Then follow this tutorial and get a yo yo that lights up when you play with it!
LED Yo-Yo Side Caps | Make:
Tutorial - Change Galaxy S8, S8+, or Note 8 Navigation Bar Color. Follow this tutorial in order to set up ADB on your Windows, Mac, or Linux PC.; Open up a Command Prompt or Terminal window and
How to change your Galaxy S8 AND Note 8 Navigation - YouTube
9.8m Followers, 19 Following, 1,070 Posts - See Instagram photos and videos from Google (@google)
Instagram - Apps on Google Play
Some cell phones have so many functions, they're almost more like mini-computers and can thus, be somewhat tricky to use. This instructional video slide show explains the different functions and features on a Palm Treo 650 mobile phone. Click around this tutorial and learn how to optimize your
How to Remove the SIM card from the Palm Centro Smartphone
How To: Get Custom Themes for YouTube on Android — Even a True Black OLED Theme News: Samsung's One UI Update Makes Internet Browsing Way Better at Night News: The Pixel 2 Has a Semi-Transparent Notification Shade — Even with the Dark Theme Enabled
YouTube 101: How to Enable the Dark Theme on Your iPhone
Last year's Asus Zenfone 5Z was an excellent phone with great hardware and an even better price point. The Zenfone 6, however, takes everything its by Jordan Palmer in ASUS, News, Phone Reviews
ZenFone 5Z (ZS620KL) | Phones | ASUS USA
0 comments:
Post a Comment