How To: Convert Any KitKat ROM on Your Nexus 4 or 5 to a Faster Flash-Friendly File System
If you're anything like me, you started down the Android-modding path for two distinct reasons; to run cutting-edge software and squeeze every bit of performance out of your hardware. Utilizing the new F2FS file system on your rooted Nexus 4 or 5 fulfills both of those desires at the same time.
What Is F2FS?F2FS, which stands for Flash-Friendly File System, is a new file system that was developed last year by a team from Samsung. It was developed and optimized specifically to be used with NAND flash memory, the type of storage used in our phones and tablets.A file system governs how data is written to and read from your device's storage memory, and its performance can make a big difference in the overall speed of an operating system. According to benchmark testing, F2FS provides a significant performance increase in most I/O operations over the more commonly used EXT4 file system, especially when it comes to database operations and data writing.These types of performance gains typically yield a more responsive Android experience, and what's not to like about that? Here's how to get F2FS on your Android device. Please enable JavaScript to watch this video.
PrerequisitesA rooted Nexus 4 or 5. A Windows computer with the proper phone drivers and Fastboot installed. An up-to-date backup of your data (this process will result in a full data wipe) that is stored in a location that is not your device, such as cloud storage or computer. Any 4.4 KitKat ROM with Busybox bundled in (most custom ROMs will have this). Please note that without Busybox present, the converted ROM will not boot.
Step 1: Download the ToolsCreate a new folder on your computer's "C" drive, then download the appropriate convertor and recovery files to it:F2FS ROM Convertor: Nexus 4 / Nexus 5 F2FS Compatible Recovery: Nexus 4 / Nexus 5 Now, to the root directory of your Nexus device's SD card, download:FormatPartitions.zip (same file for both devices) Once all file are downloaded, it's time load up your ROM and convert it! Follow along with the video embedded above if you need a more visual cue for any of the upcoming steps.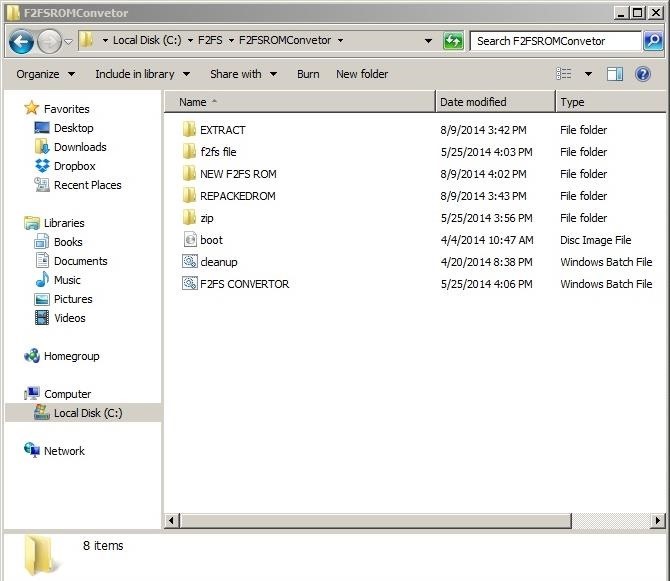
Step 2: Load Your ROM FileExtract the F2FS ROM Converter .zip file that you downloaded in Step #1. Make sure that there are no spaces in the path that you extract it to. For example:This will work: C:\F2FS\F2FSConverter.zip This will NOT: C:\F2FS Stuff\F2FSConverter.zip When you extract the .zip file, it will create several folders and two batch files, one to convert your ROM, and the other to perform cleanup afterwards. Double-click on the F2FS Converter.bat file to open the batch file. Select your device from the provided options. In the case of the Nexus 4, there is only a single option. Select Option #1 to Unpack your ROM.Next you will be asked to place the ROM that you want to convert into the EXTRACT\INPUT folder that was created when you extracted the F2FSConverter .zip file. Once the ROM is copied over, you can hit any key to proceed, as instructed by the converter. Next, the converter will delete and replace your original boot.img file. Select the correct option for your ROM, telling the converter if your ROM is AOSP- or CyanogenMod-based. If your ROM is either of these, check with your ROM developer to ensure that their build will support F2FS conversion, then select Option #14.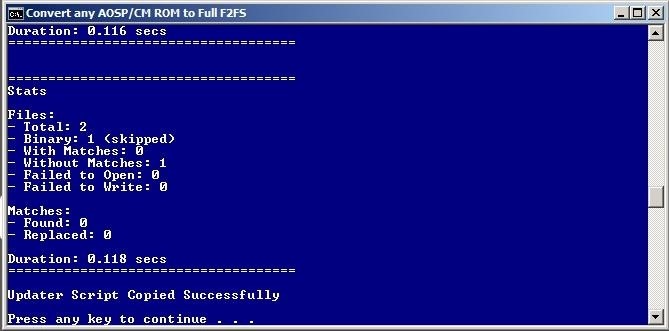
Step 3: Convert Your ROM to Support F2FSNext, you will be returned to the Unpack/Repack screen. This time, select Option #2 to Repack the ROM, and the converter will now copy over the new boot.img and updater script. Once that is complete, a new black window will open that will repack the ROM back into a flashable .zip archive. Be sure to keep both windows open until the process is completely finished, which can take between 10 and 15 minutes. Once the repacking is complete, your new F2FS-enabled ROM will be available in the NEW F2FS ROM folder within the same directory.
Step 4: Copy the Converted ROM to Your DeviceTransfer your new F2FS-compatible ROM from your computer to your device, via a USB cable, so that it's ready to be flashed.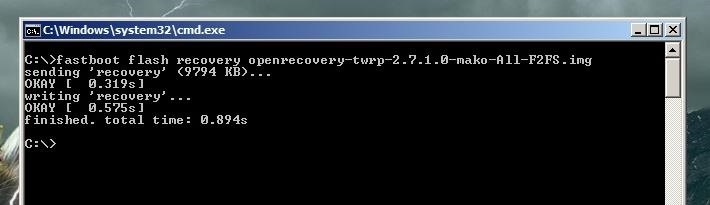
Step 5: Flash an All-F2FS Compatible RecoveryTurn on your device by holding the Power and Volume Down buttons until the fastboot menu appears, then connect your device to your computer via a known working USB cable.Navigate to the folder where you downloaded the F2FS-Compatible Recovery in Step #1, then press Shift while right-clicking and select "Open command window here," then type the following command:For the Nexus 4, use this command:fastboot flash recovery openrecovery-twrp-2.7.1.0-mako-All-F2FS.imgFor the Nexus 5, use this command:fastboot flash recovery openrecovery-twrp-2.7.0.0-hammerhead-All-F2FS-2.img
Step 6: Format PartitionsEnter into the newly installed recovery by pushing the Volume Down key on your phone until you see "Recovery Mode" at the top of the screen. Press the Power button to enter the recovery.Note that the back button on the bottom right side of the screen will now be red. This is to indicate that you have the new F2FS-enabled recovery installed, versus the standard TWRP, although the functionality will be the same.From the new recovery, tap Install and select the FormatPartitions-mako.zip that you downloaded in Step #1, then Swipe to Install. Once the .zip file is installed, reboot the recovery by tapping Home to return to the main menu and then selecting Reboot -> Recovery. If you are asked if you want to install SuperSU to root your device, select Do Not Install.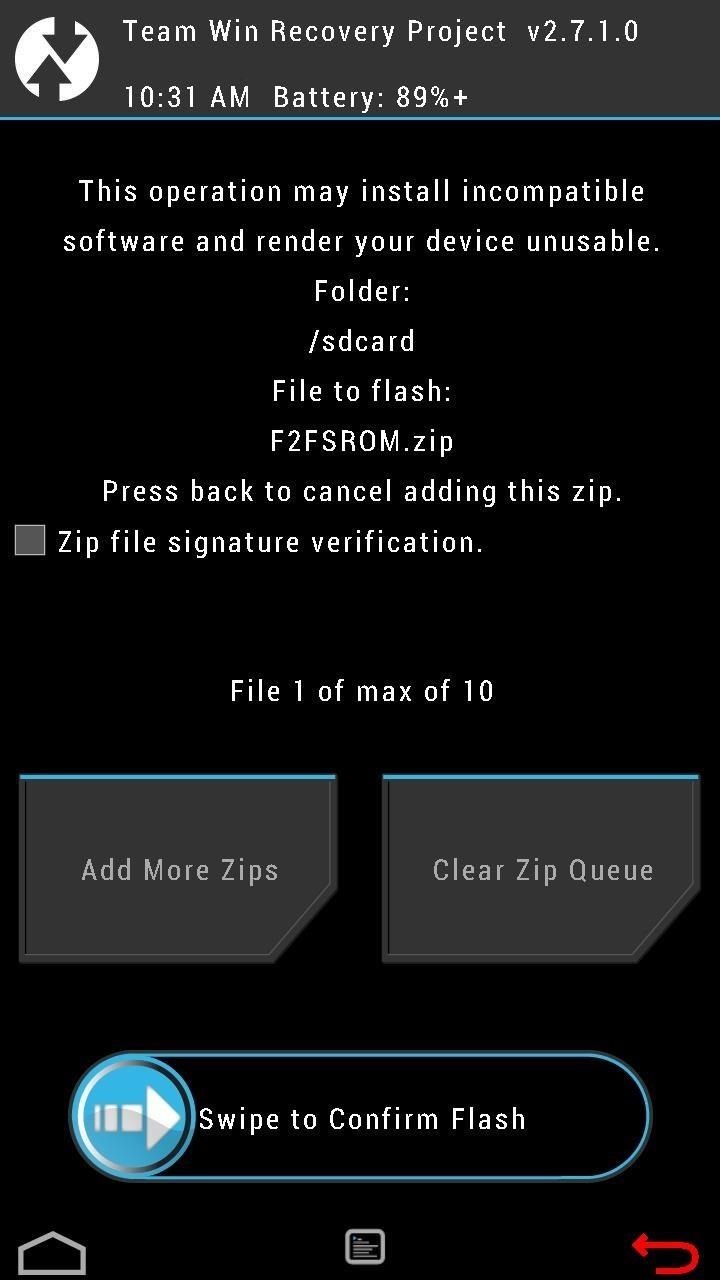
Step 7: Flash F2FS-Converted ROMOnce the recovery reboots, tap Install and select the F2FSROM.zip that you placed on your device's SD card in Step #3, then swipe the slider on the bottom to Confirm Flash. Note: You can also flash a compatible GApps package if Google Apps (including the Play Store) are not included in your ROM.You're almost done at this point, but make sure you do not reboot your device yet!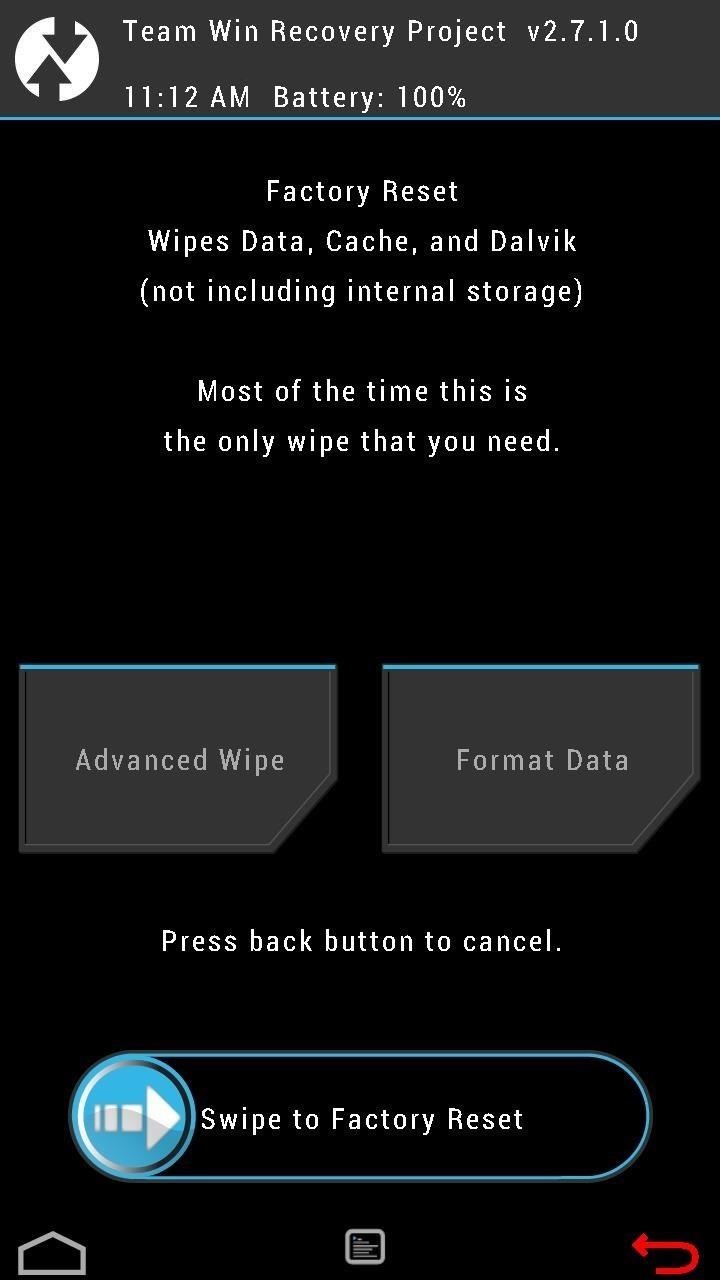
Step 8: Format Data PartitionReturn to the homepage of your recovery and enter the Wipe menu to wipe the Data partition.In TWRP, this can be done by entering the Wipe menu, tapping Data and typing "yes" to confirm. This will wipe all of your apps, backups, pictures, video, etc., so be sure that you have an up-to-date backup of your important data, stored in a location that is not on your device. Once the data partition is wiped, you can reboot your device.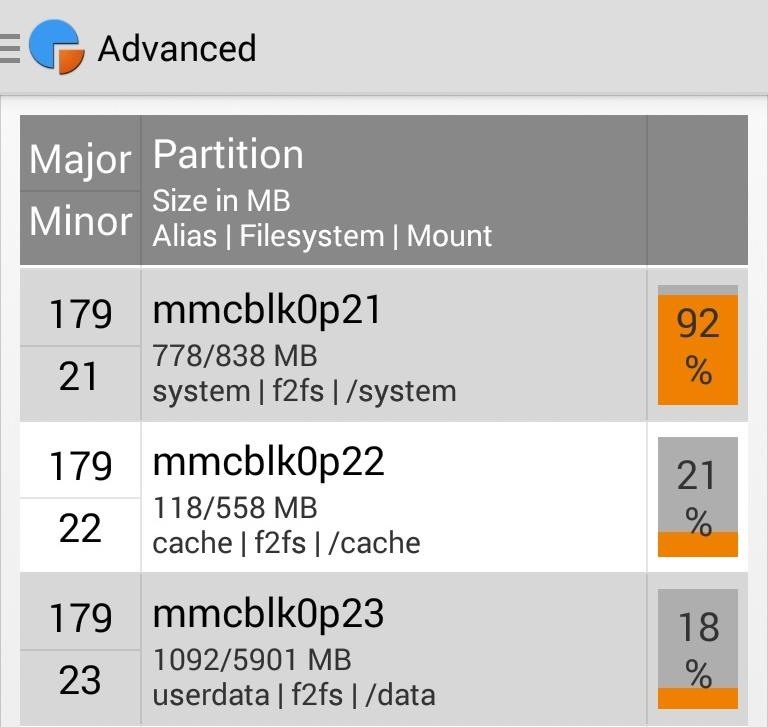
Step 9: Profit! Enjoy Your Speed & StabilityYour device is now using the the Flash-Friendly File System. Your phone should feel more responsive, especially when performing tasks that heavily involve reading from or writing to the file system. Let us know what you think of F2FS in the comments.
Every time I use Rapidshare, MegaUpload and other hosters for downloading important files, I'm stuck with lots of issues. Not to mention - slow download speed, downloading limits and lots of troubles.
How to search and download files from MediaFire - Quora
Read the latest research on everything from new longer life batteries and batteries with viruses to a nano-size battery. grid and longer-lasting news with ScienceDaily's free email
Sony is developing smartphone batteries that will last 40
About: me is a word often used by person to represent themselves , or it can be used to represent a belonging , as an example : For who is this pen? Its for me! More About thethiny » In this tutorial you will learn how to make a Nintendo 64 Portable , this was not made by me , it is made by borjaus
Build a Portable Super Nintendo - ExtremeTech
Přizpůsobte si obrazovku Android Lock s novými efekty odemknutí a přizpůsobeními Kromě toho, že je schopen změnit tapetu a přidat zkratky, Galaxy S4 zámek obrazovky neponechává mnoho v oddělení personalizace.
How to Get Back Lock Screen Customization in Android Lollipop
measure distance google maps running for using eight surprising things you can do with android on app,measure distance google maps api v3 between two points use to distances for jogging biking and hiking web,new google maps feature measures aerial distances measure distance api v3 javascript,measure distance google maps api v3 radius android
How to Use Google Maps to Measure the Distance Between 2 or
As you improve your site, you can use Google's recommendations and benchmarks to set your goals and measure your performance. After all — as the largest search engine in the world, Google can have a major impact on your success. So using their standards as your standards is never a bad idea. How to speed up your website in 2019
3 Ways to Speed up Your Site with PHP - Code Envato Tuts+
Managing apps on your iPhone's home screen are one of the easiest and most effective ways to customize your iPhone.It's especially helpful because it allows you to put apps in the order that makes sense to you and how you use them.
Manage Your Apple ID: How to Delete an Apple ID Account
Facebook created 'memorial pages' as way for friends and family to share their thoughts and feelings for those that are no longer with us. As written in a company blog post , "We created the idea of "memorialized" profiles as a place where people can save and share their memories of those who've passed."
Ghost Pranks « Wonder How To
This video will provide an idea how to change windows update setting in windows 7. This is very easy to employ. So please watch the video and follow all the steps to change windows update settings in your own PC.
How to Prevent Windows 10 from Auto-Updating - Gadget Hacks
And this is definitely the case where iPhone is concerned. In regards to iPhone XS / XS Max and XR, a hard reset (or force restart as it's sometimes called) is slightly different to other devices - but quite like the iPhone X - and we are going to show you exactly how to do that.
iPhone XS/XR: Force reset, DFU mode, SOS, and more - 9to5Mac
This issue arises whenever you try to label more than 20 tapes for the veriy first time. As the "Max. Consecutive Errors" counter is set to 20 NW will disable the device with the 21st media.
How Can It Be (CD) - Walmart.com
Oct 29, 2017 · Your tracking information is now available (if you know where to look). iPhone X Now Shipping - Here's How To Get Tracking Info Early You can read all of my Forbes articles on my profile page.
How To Track Your iPhone X Pre-Order / Shipment / Delivery?
0 comments:
Post a Comment